Scale Model Tips: Achieving Correctly Sized and Square Gun Ports
Gun Ports
The first step is to make a perfect jig/pattern of the required size.The jig is sanded with square corners and to the correct size from a piece of fine grained wood approximately 4mm thick. Mark an X on the face of the jig, to find the centre of the jig. Drill the correctly sized hole to fit the spigot of the false cannon barrel. This hole will provide a guide to drill the spigot hole in the barrel support. As the jig will be used to mark the gun ports the jig must be prevented from moving while marking the gun port. To ensure this, drill 4 holes, which are the same size as the hull planking pins. These holes should not be perfectly placed in the jig this will reduce the chance of splitting the wood.
When using the jig always ensure that the marked side is up, this will allow you to find the original position if you need to remark a port
Push hull planking pins into these holes until the point of the pins protrude approximately 1mm. If the pins move easily in the holes a drop of super glue will secure them. The planking pins provide a method of holding the pins while marking the hull. As the pin points are not symmetrical in the jig mark one of the edges with a permanent marker or paint. When using the jig always ensure that the marked side is up, this will allow you to find the original position if you need to remark a port. When marking the gun port, press the jig to force the pin points into the hull. The enter of the gun port must also be marked’ by using a similar sized drill bit or sharpened pin though the hole drilled in the centre of the jig.
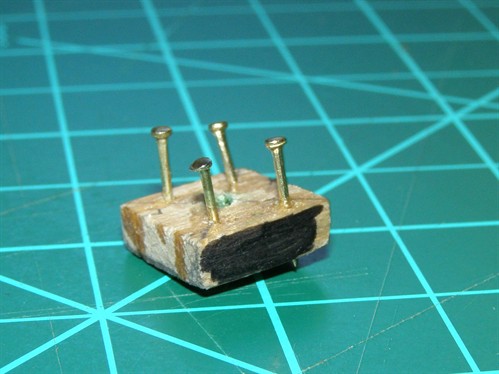
Photo 1 – The Gun Port Jig
Sanding Stick
To cut out the gun port, follow the normal procedure by cutting from the corners to the centre hole and remove the triangles and trim to the marked sides.
To obtain square corners in the gun ports, glue oversized sandpaper on the stick
To ensure the gun ports are square make a sanding stick out of a piece of wood. The size of the wood should be ½ mm smaller than the finished dimension of the gun port x 1½ mm smaller than the gun port dimension. For the HMS Victory’s 12mm x 12mm gun ports, the stick I made is 11½ mm x 9mm. The corners need to be square and the sides parallel. On the narrower side glue sandpaper with wood glue, which will soften when soaked in water – this will allow the sandpaper to be replaced when necessary. The length of the sandpaper should be between 20mm and 30mm long. To obtain square corners in the gun ports, glue oversized sandpaper on the stick and when the glue has dried trim the edges to the size of the stick.
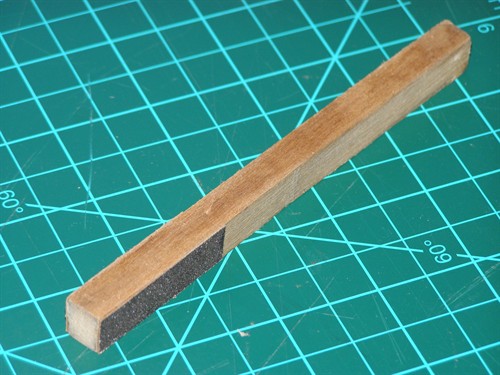
Photo 2 – The Sanding Stick
When using the sanding stick first sand the reference line i.e. the side of the rib or off set line from a rib, until correct. Then sand the top and bottom sides of the gun port using the plain side of the stick against the reference line to ensure the top and bottom are square to the reference side. Finally sand the last side using the top and bottom side as a guide for the stick. This will ensure the gun port is square. The wooden jig can also be used as a standard to check the final size of the gun ports.
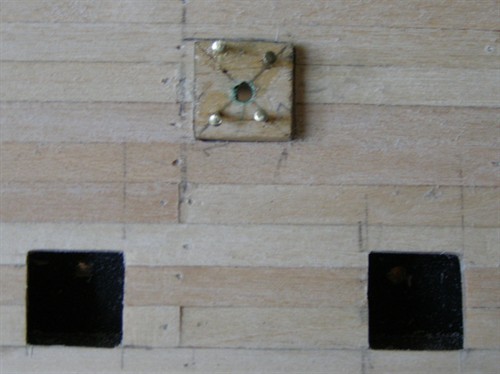
Photo 3 – Finished Square Gun Ports


