Scale Modelling Tips: How to Kit-Bash
When you’re starting out in the world of scale modelling, it’s generally best to find a model kit that comes with all the parts you need to put it together, including well laid-out guides on what parts go where. By having everything you need, you can focus on learning the basics of scale modelling, and you (should) end up with a model resembling your chosen car, plane, train, or ship. But as your confidence and skill level grows, it can be fun to stretch yourself and build something that can’t be found in any store. If you’ve built up a collection of spare parts over the year, this is where kit-bashing comes in handy.
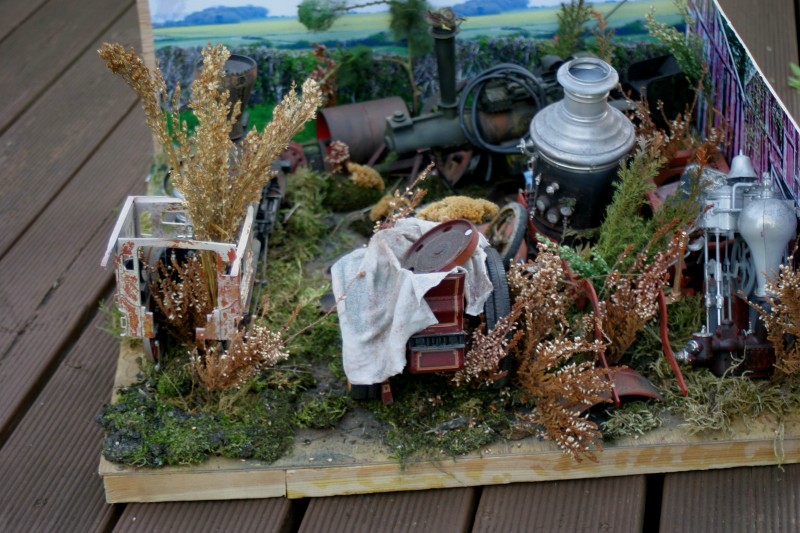
ModelSpace forum user kpnuts (Ken)’s kit-bashed “steam graveyard”
What is kit-bashing, you ask?
Unlike scratch building, which requires you to physically create the parts you need from scratch, kit-bashing involves taking multiple parts from different model kits and “bashing” them together to resemble something whole. Although this technique can be used to build almost anything in your imagination, it is commonly used for science-fiction creations. If you’re a fan of Star Wars, you’ll probably know that most of the amazing ships you see on screen didn’t come in a box. The team from ILM carefully pieced together a variety of different model parts, especially from tank models, resulting in the stunning vehicles we all know and love.
The team from ILM carefully pieced together a variety of different model parts
If you fail to plan, you plan to fail
Starting any scale model project can be daunting, especially without a plan. Before you begin, think about what you want to achieve. Is it a brand new starship? A highly advanced robot? A submarine that can also fly? Brainstorm until your heart’s content, then focus and research until you have a strong concept for what your final model will be.
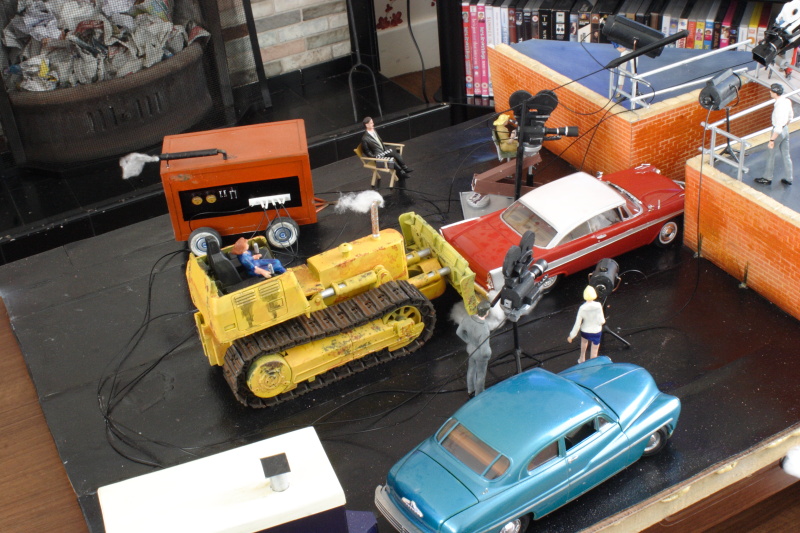
ModelSpace forum user kpnuts (Ken)’s kit-bashed diorama “Moochie death scene” from John Carpenter’s Christine
Once you know where you’re heading, you’ll want to figure out the steps to get there. Breaking your project into bite-sized pieces is a tremendous strategy here. Let’s say you are building a starship – what will you make the wings with? The landing gears? The cockpit? By focusing on the individual sections you can put together a list of the pieces you will need for each section. If you’ve ever built a ModelSpace scale model, you’ll know that they are separated into handy sections, making it easier to put the full model together. Follow a similar step when kit-bashing, and you’ll save yourself time and energy.
Hunting for pieces
As we mentioned above, if you’re a scale model veteran you’ll most likely have a horde of spare parts from all of your projects over the years. But if you’re a greener model maker, now’s the time to reach out to friends and fellow modellers. With your lists of required parts in hand, take your time to source as many parts as possible before you begin.
The key is to get all of your parts in one, easy-to-manage place
Tupperware containers come in handy at this stage, and should be labelled according to the sections you planned out. Although you may have a good idea of the parts you need, feel free to add random parts as you find them. A leftover jet engine might work well as a repurposed weapon! The key is to get all of your parts in one, easy-to-manage place.
Starting simple
With all your parts at the ready, now’s the time to work your build magic. Using plenty of blu tack or cellotape, start creating your masterpiece. Keep it rough, and pay attention to how the parts fit. It won’t all come together at once, and it certainly won’t be perfect on the first go, but if you can get the mechanics and basic structure sorted now you’ll be able to work it into your final vision. Avoid cutting or using glue until you’re 100% confident with where everything should be.
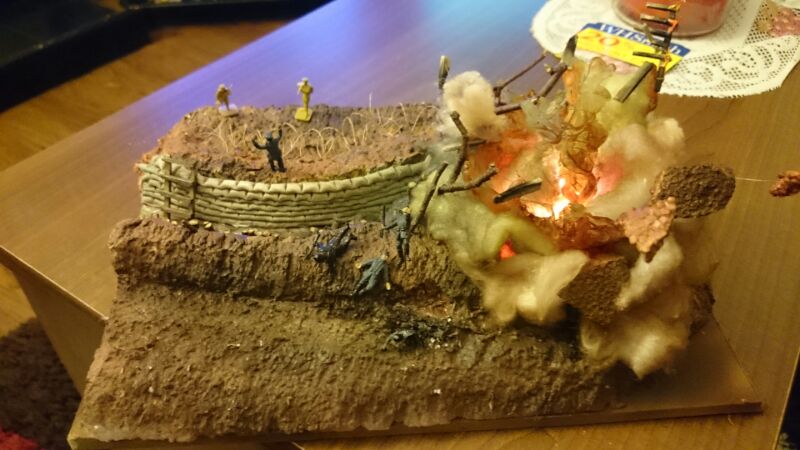
ModelSpace forum user kpnuts (Ken)’s kit-bashed “WWI horror of the trenches” diorama
Cutting the fat
One obvious thing you’ll notice early into the building stage is that your parts weren’t design to fit. This is where your craft knife and sandpaper come in handy. Following your plans closely, cut or sand away any areas that prevent a cohesive connection between your mismatched parts. This may mean you have to take away some otherwise cool looking details, but keep your mind on the bigger picture. Take your time, and only remove small parts at a time – you can always remove more if you need to.
Test, stick, and fill
Once you’ve repurposed your parts, now’s the time to test that they all fit together as intended. Again, use blu tack or tape to hold the parts in place, and move things around as required. Once you’re happy that the parts fit, and that the overall look is what you want, you can start applying glue. It may sound like tired advice by now, but take baby steps and only stick together sections that you are certain about.
Wipe away any excess fill material to avoid unsightly lumps or marks
Once the glue is set and parts are bonded, you may notice some gaps remain. Don’t panic, these can be easily fixed with either some plastic glue, putty, or filler. Go over each gap and touch them up as necessary, making sure to wipe away any excess fill material to avoid unsightly lumps or marks.
Detailing and finishing
Once you’ve gone through the above steps for each section, and have pieced together the overall model, you should have something resembling your original vision. Now’s the time to really make it shine. Do you want to add a few more minor parts? Or give it a sweet, slick paint job? The freedom is yours now to add as much or as little detail as you desire. If you’re looking for some cool techniques to try out, check out our Beyond the Basics blog, or head to our Guides section for a few more awesome tips!
Scale modelling is one of the most creative hobbies you can enjoy, and we love seeing the skill and hard work on display in our scale modelling community. If you’ve ever kit-bashed a model, or are currently putting one together, please let us know in the comments, or share your work on the ModelSpace forum or social media channels!


